想要识别图片上的是否包含某个物品,找了一圈决定使用 ImageAI 试一试,简单测试,很好用。
环境信息
服务器:Dell T630
系统:Ubuntu 18.04
安装依赖
更新软件包列表
apt update

# 安装python工具包
apt install python3-dev python3-pip python3-venv
安装 Tensorflow 1.15
# 创建虚拟环境(在虚拟环境升级pip及安装python模块不会影响系统的包,推荐)
python3 -m venv --system-site-packages pyenv

# 激活
source pyenv/bin/activate

# 升级 pip
pip install --upgrade pip

# 查看pip版本
pip --version
# output: pip 20.3.1

# 安装 GPU 版本的
pip install tensorflow-gpu==1.15
安装 opencv-python 和 keras
pip install opencv-python
pip install keras==2.3.1
安装 ImageAI
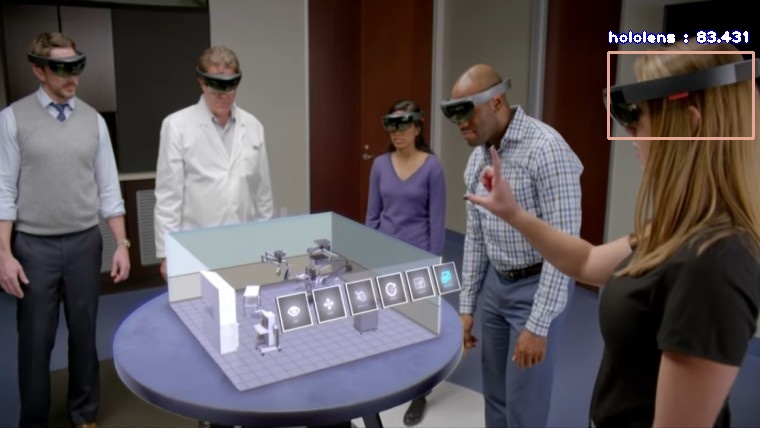
pip3 install imageai --upgrade使用官方模型测试
参考:https://github.com/OlafenwaMoses/ImageAI/blob/master/imageai/Detection/Custom/CUSTOMDETECTION.md
下载模型及JSON文件
- hololens-ex-60--loss-2.76.h5 (Size = 236 mb)
- detection_config.json
创建 FirstCustomDetection.py
from imageai.Detection.Custom import CustomObjectDetection

detector = CustomObjectDetection()
detector.setModelTypeAsYOLOv3() # 使用YOLOv3类型的模型
detector.setModelPath("hololens-ex-60--loss-2.76.h5") # 设置模型文件
detector.setJsonPath("detection_config.json") # 设置模型对应的json配置
detector.loadModel() # 加载模型文件
detections = detector.detectObjectsFromImage(input_image="holo2.jpg", output_image_path="holo2-detected.jpg")
# 循环输出识别到对象所在图片的位置信息
for detection in detections:
    print(detection["name"], " : ", detection["percentage_probability"], " : ", detection["box_points"])
运行
python3 FirstCustomDetection.py我运行的时候报错了
AttributeError: 'str' object has no attribute 'decode'是新版 h5py 版本升级导致的,在安装 tensorflow 的时候可以指定 h5py 版本
pip install tensorflow h5py<3.0.0刚才没指定,可以降级
pip install 'h5py<3.0.0'再次运行,结果
(pyenv) root@hylink:/home/dong/test_imageai# python3 FirstCustomDetection.py
Using TensorFlow backend.
WARNING:tensorflow:From /home/dong/test_imageai/pyenv/lib/python3.6/site-packages/tensorflow_core/python/ops/resource_variable_ops.py:1630: calling BaseResourceVariable.__init__ (from tensorflow.python.ops.resource_variable_ops) with constraint is deprecated and will be removed in a future version.
Instructions for updating:
If using Keras pass *_constraint arguments to layers.
WARNING:tensorflow:From /home/dong/test_imageai/pyenv/lib/python3.6/site-packages/keras/backend/tensorflow_backend.py:422: The name tf.global_variables is deprecated. Please use tf.compat.v1.global_variables instead.

hololens  :  87.66433596611023  :  [23, 45, 90, 79]
hololens  :  89.2517626285553  :  [191, 64, 243, 93]
hololens  :  64.49639797210693  :  [437, 76, 514, 127]
hololens  :  91.78624749183655  :  [380, 109, 423, 134]
输出检测到了 4 个设备
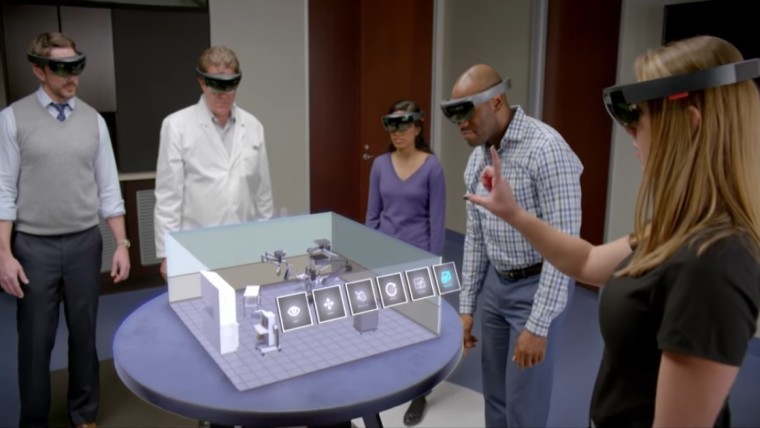
官网示例结果
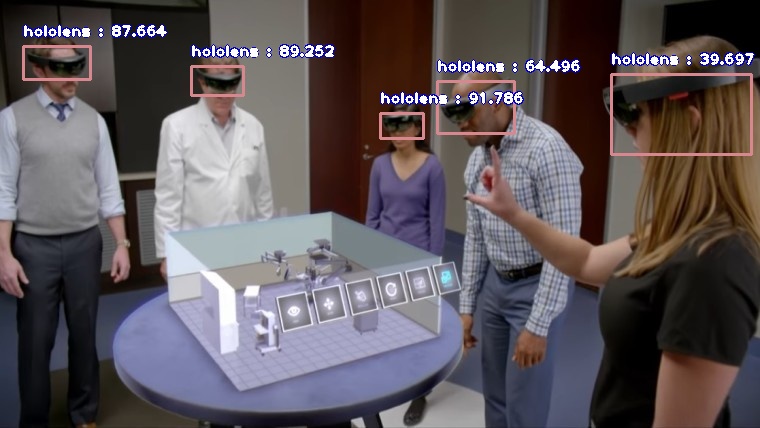
我使用官网模型结果
我觉得是网站提供的模型和它展示的示例模型不是一个数据集
暂时先忽略这些细节,看一下如何根据自定义数据集训练识别特定物品的模型
训练模型步骤
1)首先,准备自定义数据集 至少应该准备200个图片作为样本。
2)然后对自定义数据集需要对图片上待识别物进行标注
使用 labelImg 可以方便的对图片进行标注
Windows 可执行程序下载地址:https://github.com/tzutalin/labelImg/releases
默认保存的为 “Pascal VOC format” 格式,标注保存后图片当前文件夹出现同名的 xml 注解文件
参考文末:<示例1:注解 XML 文件>,这个格式也正是 ImageAi 需要的。
3)数据集与标注文件命名
如果图片名为 image01.jpg,那么默认生成的注解文件名为 image01.xml,不要修改它们的文件名。
4)标记完成后需要将图片及注解文件按要求放置 创建一个顶层目录,例如:custom_dataset 在下边创建两个子目录,train 与 validation
5)在 train 目录下创建 images 与 annotations 子文件夹 将 70% ~ 80% 的图片及标注文件放到 train 目录内,例如image01.jpg 放置到 train/images 目录,对应的 image01.xml 放置到 train/annotations 文件夹。
6)在 validation 目录下创建 images 与 annotations 子文件夹
同理,将剩余的 图片及标注文件放置到 validation 目录内。
7)最终的目录结构举例
参考文末:<示例2:训练集图片结构>
8)除了自己从零开始训练外,还可以基于预先训练的 YOLOv3模型(pre-trained YOLOv3 model)训练,推荐,因为识别的效果会更好。
使用官方数据集训练
在收集与标注自定义图像集之前,ImageAi 提供了两个数据集,已经进行过标注,可供测试使用。
下载地址:https://github.com/OlafenwaMoses/ImageAI/releases/tag/essential-v4
接下来我使用 hololens.zip 数据集进行训练,并且使用了 pretrained-yolov3.h5 预训练集。
代码 lets_train.py
#!/bin/env python3
# -*- coding: utf-8 -*-

from imageai.Detection.Custom import DetectionModelTrainer

trainer = DetectionModelTrainer()
trainer.setModelTypeAsYOLOv3()
trainer.setDataDirectory(data_directory="hololens") # 使用同层级的 hololens 作为数据源
trainer.setTrainConfig(object_names_array=["hololens"], batch_size=16, num_experiments=200, train_from_pretrained_model="pretrained-yolov3.h5")
# In the above,when training for detecting multiple objects,
#set object_names_array=["object1", "object2", "object3",..."objectz"]
trainer.trainModel()
输出
(pyenv) root@hylink:/home/dong/test_imageai/about_train# python3 lets_train.py
Using TensorFlow backend.
Generating anchor boxes for training images and annotation...
Average IOU for 9 anchors: 0.78
Anchor Boxes generated.
Detection configuration saved in  hololens/json/detection_config.json
Training on:     ['hololens']
Training with Batch Size:  16
Number of Experiments:  200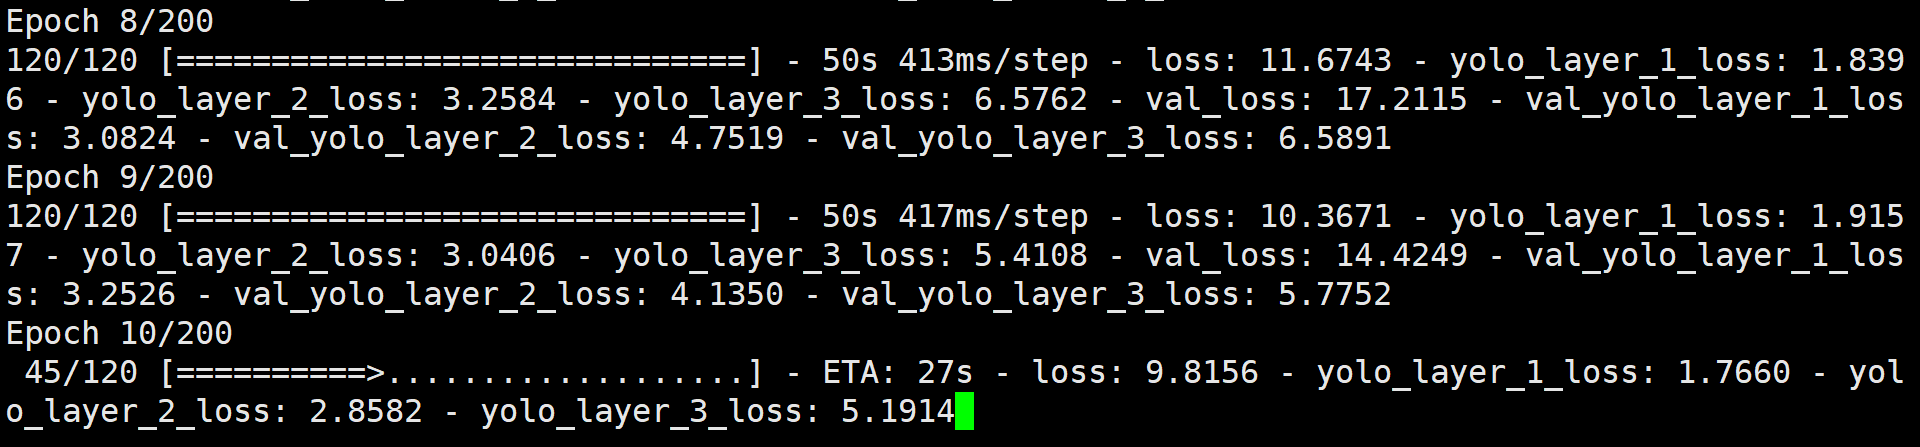
PS:参数我还没研究过,就不凭感觉描述用途了
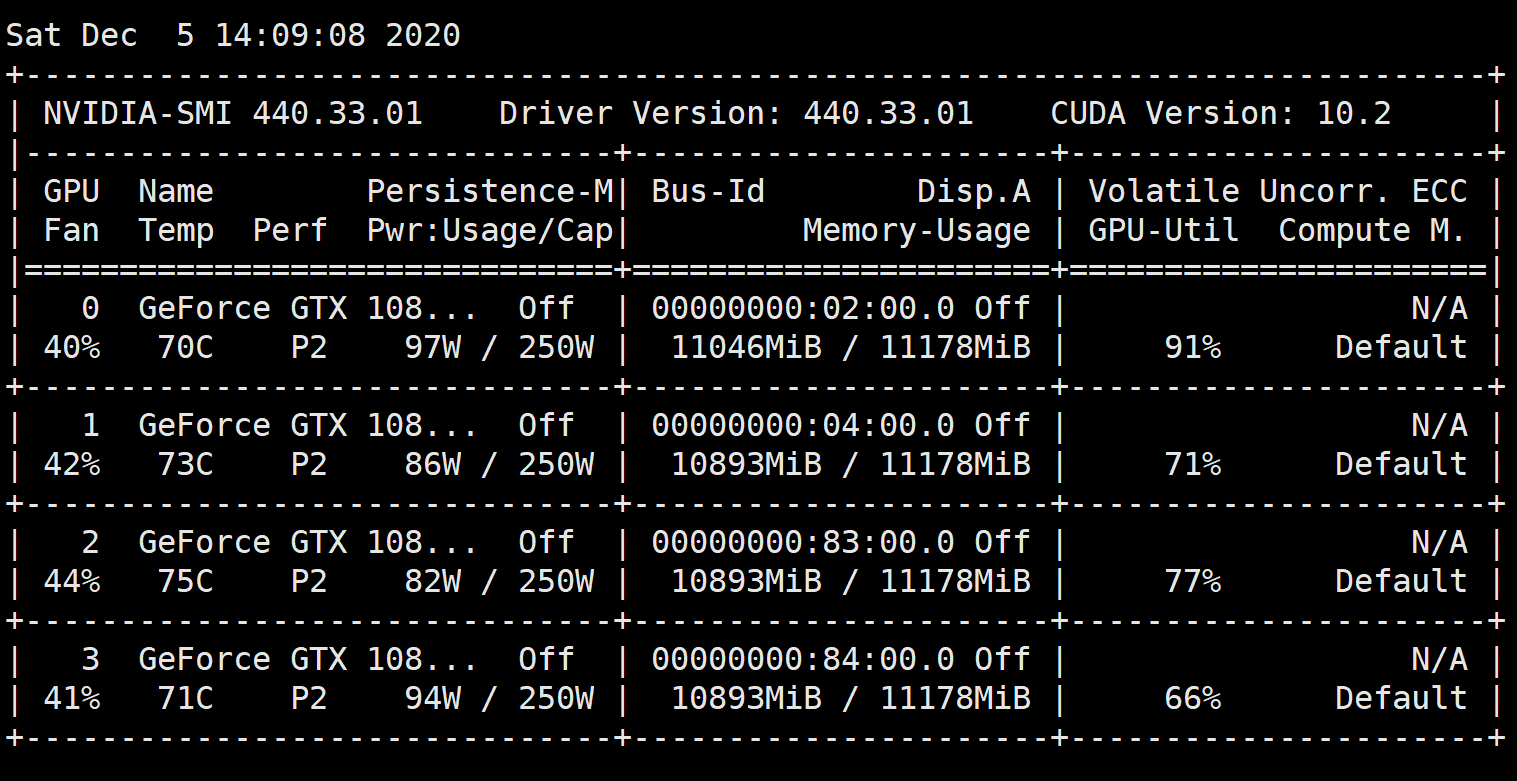
这个时候程序底层就开始运算,可以使用 watch -n 0.5 nvidia-smi 命令查看 GPU 运行情况
hylink@hylink:~$ nvidia-smi
Sat Dec  5 13:38:16 2020
+-----------------------------------------------------------------------------+
| NVIDIA-SMI 440.33.01    Driver Version: 440.33.01    CUDA Version: 10.2     |
|-------------------------------+----------------------+----------------------+
| GPU  Name        Persistence-M| Bus-Id        Disp.A | Volatile Uncorr. ECC |
| Fan  Temp  Perf  Pwr:Usage/Cap|         Memory-Usage | GPU-Util  Compute M. |
|===============================+======================+======================|
|   0  GeForce GTX 108...  Off  | 00000000:02:00.0 Off |                  N/A |
| 42%   72C    P2    88W / 250W |  11046MiB / 11178MiB |     59%      Default |
+-------------------------------+----------------------+----------------------+
|   1  GeForce GTX 108...  Off  | 00000000:04:00.0 Off |                  N/A |
| 46%   77C    P2    90W / 250W |  10893MiB / 11178MiB |     27%      Default |
+-------------------------------+----------------------+----------------------+
|   2  GeForce GTX 108...  Off  | 00000000:83:00.0 Off |                  N/A |
| 23%   28C    P8     8W / 250W |     10MiB / 11178MiB |      0%      Default |
+-------------------------------+----------------------+----------------------+
|   3  GeForce GTX 108...  Off  | 00000000:84:00.0 Off |                  N/A |
| 23%   26C    P8     9W / 250W |     10MiB / 11178MiB |      0%      Default |
+-------------------------------+----------------------+----------------------+

+-----------------------------------------------------------------------------+
| Processes:                                                       GPU Memory |
|  GPU       PID   Type   Process name                             Usage      |
|=============================================================================|
|    0     17667      C   python3                                     3043MiB |
|    0     22690      C   python3                                     7989MiB |
|    1     22690      C   python3                                    10879MiB |
+-----------------------------------------------------------------------------+
此时观察,会看到有两个GPU在工作,另外两个在休息,这是因为 ImageAI 代码中默认值使用两个GPU
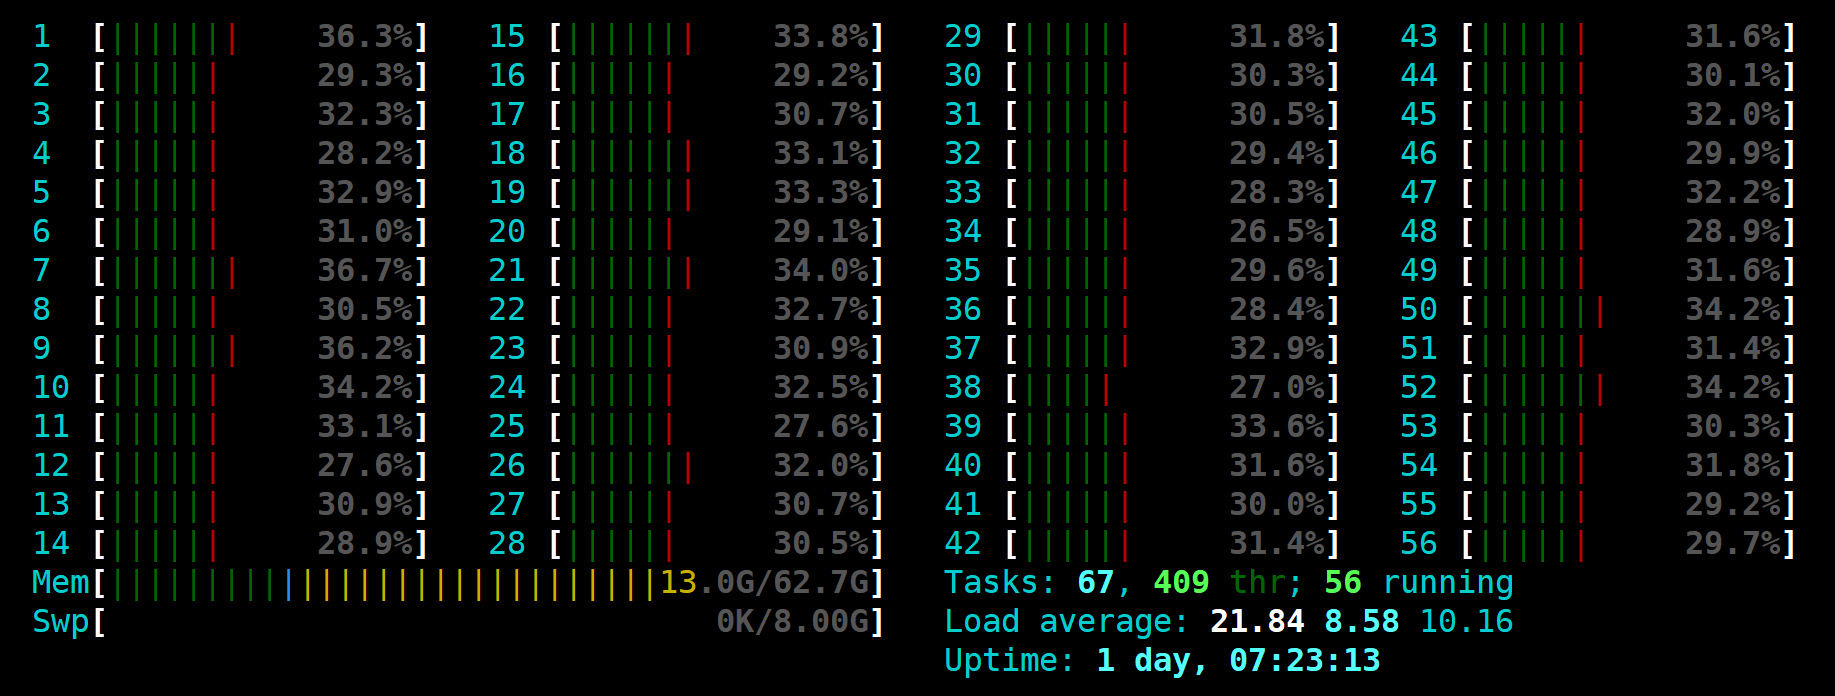
使用4个GPU进行训练
编辑 imageai 包的初始化代码
# 我的虚拟环境下的包路径
sudo vim pyenv/lib/python3.6/site-packages/imageai/Detection/Custom/__init__.py
修改默认的 self.__train_gpus = "0,1" 为 self.__train_gpus = "0,1,2,3"
重新开始训练,GPU 都安排上了
CPU 也在努力工作,很欣慰
运行完成
Epoch 198/200
120/120 [==============================] - 50s 420ms/step - loss: 5.4906 - yolo_layer_1_loss: 0.8621 - yolo_layer_2_loss: 1.6695 - yolo_layer_3_loss: 2.9589 - val_loss: 11.1780 - val_yolo_layer_1_loss: 1.7256 - val_yolo_layer_2_loss: 3.4431 - val_yolo_layer_3_loss: 5.2425
Epoch 199/200
120/120 [==============================] - 51s 423ms/step - loss: 5.7349 - yolo_layer_1_loss: 0.8641 - yolo_layer_2_loss: 1.6926 - yolo_layer_3_loss: 3.1783 - val_loss: 8.7078 - val_yolo_layer_1_loss: 2.2267 - val_yolo_layer_2_loss: 3.2751 - val_yolo_layer_3_loss: 5.3582
Epoch 200/200
120/120 [==============================] - 49s 407ms/step - loss: 5.0451 - yolo_layer_1_loss: 0.6139 - yolo_layer_2_loss: 1.4498 - yolo_layer_3_loss: 2.9814 - val_loss: 9.1509 - val_yolo_layer_1_loss: 2.6037 - val_yolo_layer_2_loss: 3.0049 - val_yolo_layer_3_loss: 5.1162

real    171m38.124s
user    2880m52.385s
sys    579m24.720s
本次训练 hololens 花费了将近 3 个小时,打印的日志 loss 参数越小越好。
在 holoens 目录下会有 models 和 json 文件夹
-rw-r--r-- 1 root root 246974768 Dec  5 13:27 detection_model-ex-001--loss-0031.786.h5
-rw-r--r-- 1 root root 246974768 Dec  5 14:06 detection_model-ex-001--loss-0117.871.h5
-rw-r--r-- 1 root root 246974768 Dec  5 13:33 detection_model-ex-001--loss-0126.182.h5
-rw-r--r-- 1 root root 246974768 Dec  5 13:34 detection_model-ex-002--loss-0027.787.h5
-rw-r--r-- 1 root root 246974768 Dec  5 14:07 detection_model-ex-002--loss-0037.375.h5
-rw-r--r-- 1 root root 246974768 Dec  5 13:35 detection_model-ex-003--loss-0017.799.h5
-rw-r--r-- 1 root root 246974768 Dec  5 14:08 detection_model-ex-003--loss-0026.214.h5
-rw-r--r-- 1 root root 246974768 Dec  5 13:36 detection_model-ex-004--loss-0014.231.h5

...

-rw-r--r-- 1 root root 246974768 Dec  5 14:23 detection_model-ex-021--loss-0005.558.h5
-rw-r--r-- 1 root root 246974768 Dec  5 14:24 detection_model-ex-022--loss-0005.279.h5
-rw-r--r-- 1 root root 246974768 Dec  5 14:27 detection_model-ex-026--loss-0005.250.h5
-rw-r--r-- 1 root root 246974768 Dec  5 14:28 detection_model-ex-027--loss-0005.109.h5
-rw-r--r-- 1 root root 246974768 Dec  5 14:29 detection_model-ex-028--loss-0004.986.h5
-rw-r--r-- 1 root root 246974768 Dec  5 14:34 detection_model-ex-034--loss-0004.900.h5
-rw-r--r-- 1 root root 246974768 Dec  5 15:00 detection_model-ex-066--loss-0004.848.h5
-rw-r--r-- 1 root root 246974768 Dec  5 15:06 detection_model-ex-073--loss-0004.745.h5
生成了很多的 models,“应该” 是选择一个就行,我选择了 detection_model-ex-073--loss-0004.745.h5 ,将它复制出来,以及 json 目录下的 detection_config.json,这两个就是最终训练的成果了。
上边的 FirstCustomDetection.py 脚本,将其中的模型和 JSON 文件替换为我们训练的文件就可以了。
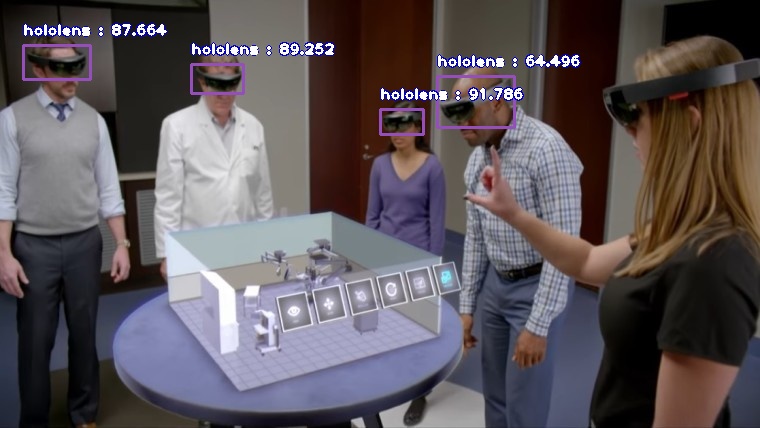
使用模型运行之前的示例图片
跟之前官网模型识别结果互补了 ,合起来就是官网示例 😄 另一个数据集是 headset,头戴设备正面
ImageAI 开箱即用,物体侦测很好用,Github 的文档也详尽,感谢开源!
还有其它很实用的功能,后续有时间进一步测试与学习,先这样~
示例1:注解 XML 文件
<annotation>
    <folder>images</folder>
    <filename>image01.png</filename>
    <path>C:/Users/solid/Desktop/image01.png</path>
    <source>
        <database>Unknown</database>
    </source>
    <size>
        <width>460</width>
        <height>208</height>
        <depth>3</depth>
    </size>
    <segmented>0</segmented>
    <object>
        <name>nayin</name>
        <pose>Unspecified</pose>
        <truncated>1</truncated>
        <difficult>0</difficult>
        <bndbox>
            <xmin>165</xmin>
            <ymin>161</ymin>
            <xmax>222</xmax>
            <ymax>208</ymax>
        </bndbox>
    </object>
</annotation>
示例2:训练集图片结构
.
├── train
│   ├── annotations
│   │   ├── image01.xml
│   │   ├── image02.xml
│   │   └── image03.xml
│   └── images
│       ├── image01.jpg
│       ├── image02.jpg
│       └── image03.jpg
└── validation
    ├── annotations
    │   ├── image76.xml
    │   ├── image77.xml
    │   └── image78.xml
    └── images
        ├── image76.jpg
        ├── image77.jpg
        └── image78.jpg
参考:
- https://github.com/OlafenwaMoses/ImageAI/issues/288