我使用的 MistGPU 上的服务,临时测试 AI 很方便。


确认已安装 CUDA
$ nvcc --version
$ nvidia-smi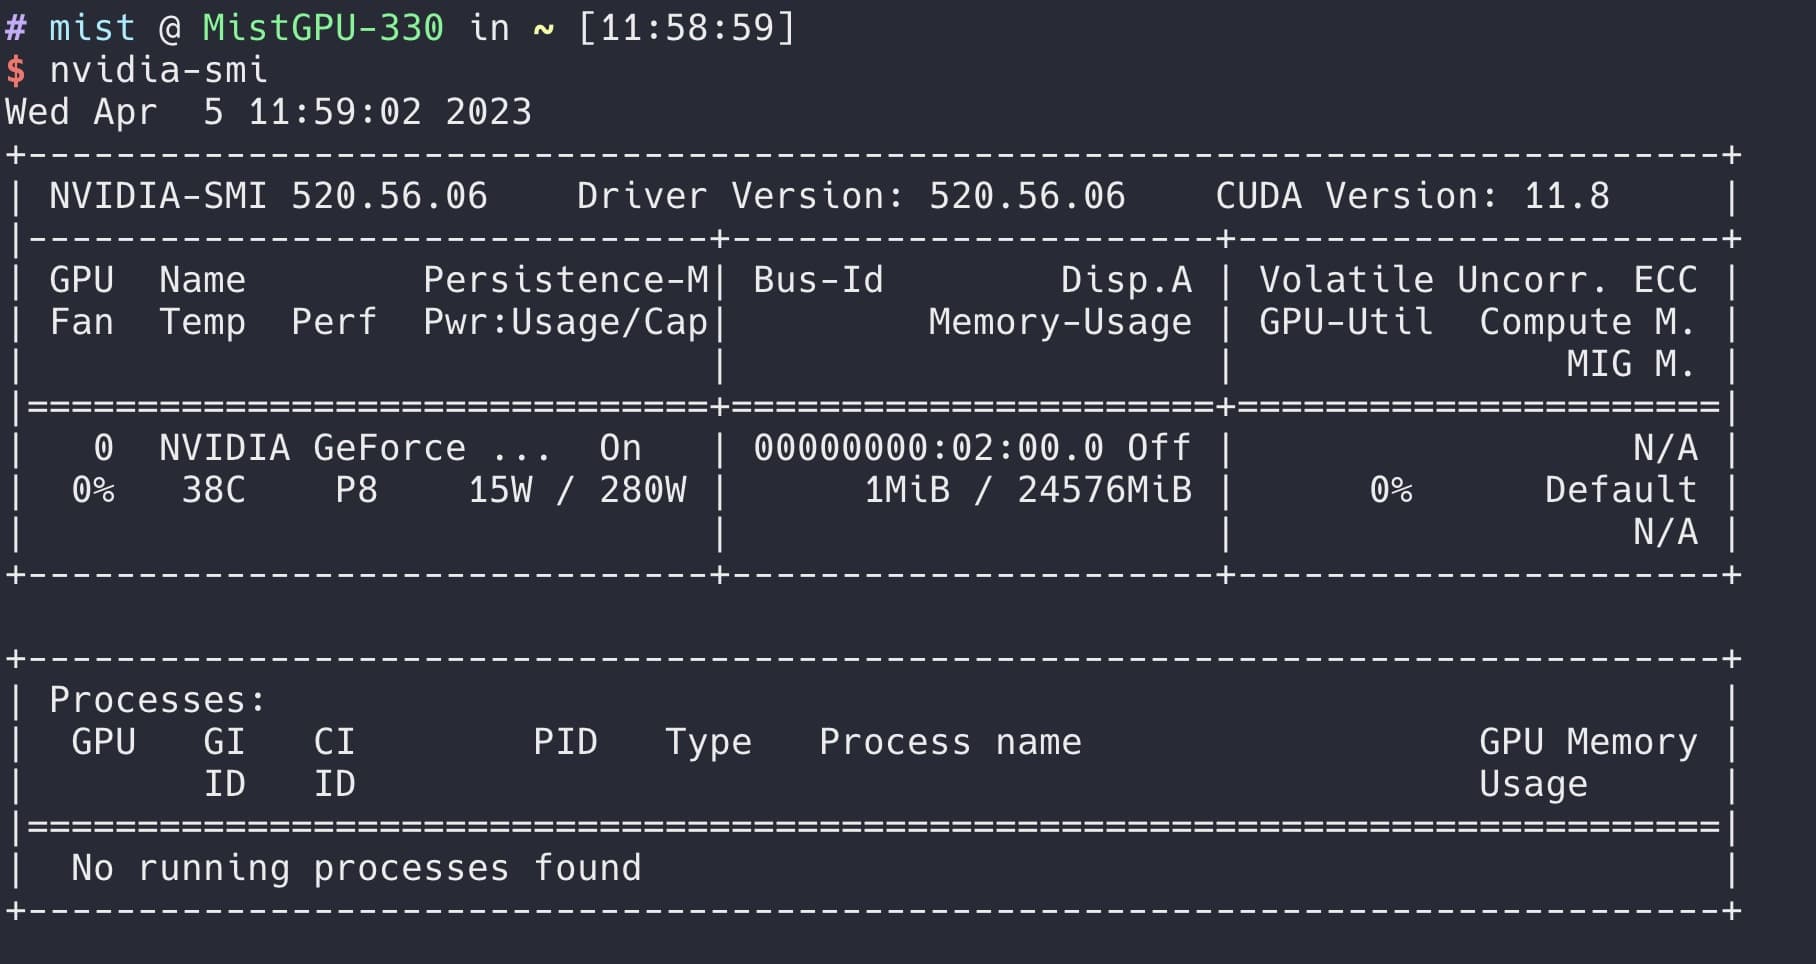
使用 conda 创建环境
$ conda create -n webui python=3.10.6

$ conda activate webui
Git 换源
git config --global url."http://gh.mistgpu.com:81/".insteadOf "https://github.com/"UI 项目
stable-diffusion-webui 是比较成熟的项目,现在很多人在用。
$ git clone https://github.com/AUTOMATIC1111/stable-diffusion-webui.git进入文件夹:
cd stable-diffusion-webui
查看源
$ pip config list
global.format='columns'
global.index-url='https://mirrors.bfsu.edu.cn/pypi/web/simple'
(webui)
下载模型
基础模型:runwayml/stable-diffusion-v1-5
# 下载后放置到 models/Stable-diffusion/ 目录下
cp /data/v1-5-pruned-emaonly.ckpt stable-diffusion-webui/models/Stable-diffusion/
安装依赖
我在安装时,国内源还没有同步 gradio 3.23 版本,看网上的建议可以将两个依赖中的文件修改为 3.22

在 stable-diffusion-webui 项目下执行

# 修改 gradio==3.23 为 gradio==3.22
$ pip3 install -r requirements_versions.txt -i https://pypi.tuna.tsinghua.edu.cn/simple

$ pip3 install -r requirements.txt -i https://pypi.tuna.tsinghua.edu.cn/simple
可以用以下命令安装 3.23 的包
pip3 install --upgrade gradio==3.23 -i https://pypi.tuna.tsinghua.edu.cn/simple 安装 PyTorch

如果在国内机器上如果下载 pytorch 很慢,可以先下载到机器节省时间。
链接:https://download.pytorch.org/whl/cu117/torch-1.13.1%2Bcu117-cp310-cp310-linux_x86_64.whl
$ /home/mist/stable-diffusion-webui/venv/bin/pip3 install ../torch-1.13.1%2Bcu117-cp310-cp310-linux_x86_64.whl

$ /home/mist/stable-diffusion-webui/venv/bin/pip3 install torchvision==0.14.1+cu117  --extra-index-url https://download.pytorch.org/whl/cu117
修改端口
编辑 webui-user.sh, 内容如下
# 如果只需要修改端口
export COMMANDLINE_ARGS="--port 23105"

# 绑定 0.0.0.0 端口,同时修改端口
export COMMANDLINE_ARGS="--listen --port 23105"
启动
bash ./webui.sh备忘
程序自动下载这些内容,可以手动执行查看到进度。
"git" clone "https://github.com/CompVis/taming-transformers.git" "/home/mist/stable-diffusion-webui/repositories/taming-transformers"
"git" clone "https://github.com/sczhou/CodeFormer.git" "/home/mist/stable-diffusion-webui/repositories/CodeFormer"
"git" clone "https://github.com/salesforce/BLIP.git" "/home/mist/stable-diffusion-webui/repositories/BLIP"
启动后看到 “http://0.0.0.0:23105” 即可通过浏览器访问。

如果你使用的 MistGPU,服务默认暴露的端口是 SSH 端口号 + 4,例:“http://gpu20.mistgpu.xyz:23105”
接下来,体验 Stable Diffusion 的乐趣吧~(默认的 v1-5-pruned-emaonly 模型效果一般,不要抱太多期望,想要更好的效果需要对模型和 Prompt 有更多的了解)
基本使用
先让 ChatGPT 给一个描述
This is a cozy pink house located in a quiet neighborhood. The exterior of the house is painted in a light pink color, complemented by white wooden windows and doors. The front yard features a lush green lawn, surrounded by various colorful flowers and green shrubs. There is a white rocking chair on the porch, inviting people to sit and enjoy the beautiful surroundings.
这是一个温馨的粉色房子,位于一个安静的社区中。房子外墙是淡粉色的,配有白色的木制窗户和门。前院中有一片绿油油的草坪,周围种植着各种色彩鲜艳的鲜花和绿色的灌木。门廊上有一把白色的摇椅,让人可以坐下来欣赏周围的美景。
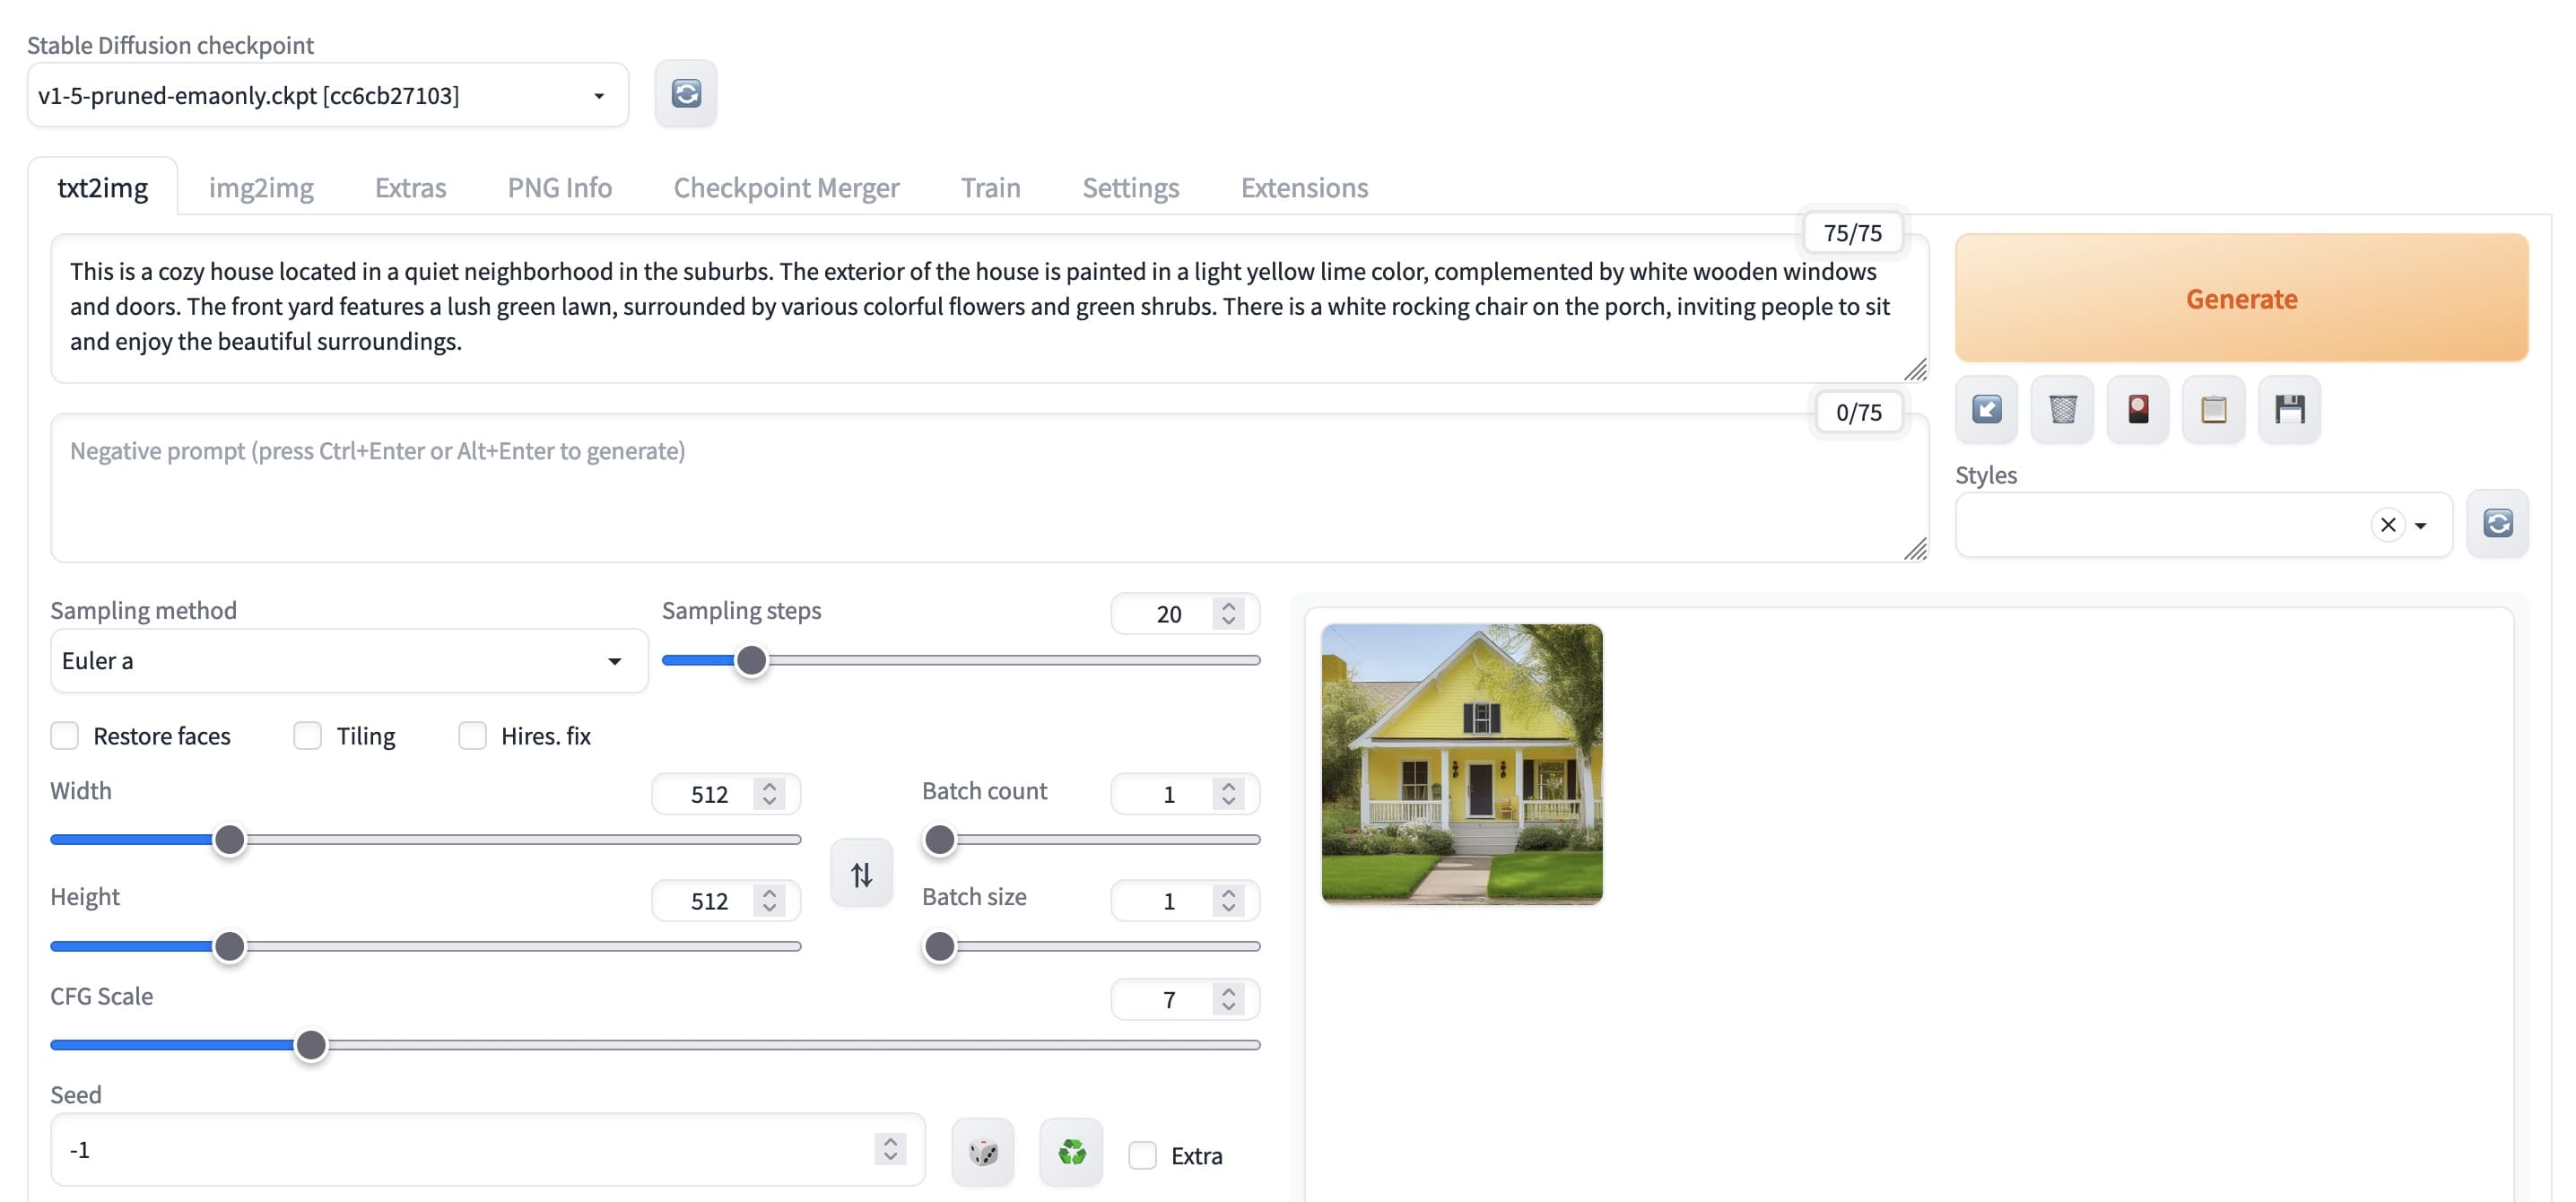
然后用 Stable Diffusion 生成

后续有时间再研究 Prompt 及其它模型。
参考
- Linux上如何使用Stable Diffusion WebUI
- Ubuntu安装stable-diffusion-webui详细教程
- 手把手教你安装运行AI绘图Stable-Diffution-Webui(Mac OS篇)
- 喂饭级stable_diffusion_webUI使用教程
- AI繪圖:Windows安裝Stable Diffusion WebUI教學
- 自力更生:Stable Diffusion webui本地部署遇到的坑及解决 / 检查 pytorch 及版本。
- PLEASE HELP!!! My local Stable Diffusion WebUI is not using my NVIDIA GPU? It's using my CPU instead.