本文内容仅用于计算机网络与信息安全的学习与研究,不构成任何形式的技术服务或操作建议,亦不鼓励将相关信息用于非学术目的。
项目地址:https://github.com/anytls/anytls-go
项目介绍:一个试图缓解嵌套的 TLS 握手指纹(TLS in TLS) 问题的代理协议。
anytls-go是该协议的参考实现。
在服务器运行 AnyTLS Server
实验环境下,临时关闭防火墙,放行端口
iptables -F
firewall-cmd --permanent --add-port 8443/tcp
firewall-cmd --reload
到 Release 获取最新版并下载运行
$ wget -O anytls_0.0.12_linux_amd64.zip https://github.com/anytls/anytls-go/releases/download/v0.0.12/anytls_0.0.12_linux_amd64.zip

$ unzip anytls_0.0.12_linux_amd64.zip

$ ./anytls-server -l 0.0.0.0:8443 -p 密码
本地运行 AnyTLS Client
替换服务器的 IP、端口以及连接密码
./anytls-client -l 127.0.0.1:1080 -s 服务器IP:8443 -p 密码v0.0.12 起支持 URI 格式连接:
bash
./anytls-client -l 127.0.0.1:1080 -s "anytls://密码@服务器IP:8443"
本地访问测试
不使用转发
curl https://ip.me使用 AnyTLS 转发请求
curl -x socks5://127.0.0.1:1080 https://ip.me预期会打印出服务器的 IP
服务端使用 Mihomo 启动运行
Mihomo 是个高性能、跨平台的代理规则处理核心;
安装 Mihomo 服务
下载地址:https://github.com/MetaCubeX/mihomo/releases
$ wget https://github.com/MetaCubeX/mihomo/releases/download/v1.19.26/mihomo-linux-amd64-v2-go123-v1.19.26.gz

$ gzip -d mihomo-linux-amd64-v2-go123-v1.19.26.gz

$ mv mihomo-linux-amd64-v2-go123-v1.19.26 /usr/local/bin/mihomo
$ chmod +x /usr/local/bin/mihomo

# 添加目录到环境变量
$ echo 'export PATH="/usr/local/bin:$PATH"' >> ~/.bashrc
我下载的 V2 版本,因为使用 V3 版本报错 “This program can only be run on AMD64 processors with v3 microarchitecture support.”
执行测试
mihomo -v输出
Mihomo Meta v1.19.26 linux amd64 with go1.23.12 Mon May 31 01:06:20 UTC 2026
Use tags: with_gvisor
生成自签证书
openssl req -x509 -newkey ec:<(openssl ecparam -name prime256v1) \
  -keyout server.key \
  -out server.crt \
  -days 825 \
  -nodes \
  -sha256 \
  -subj "/CN=bing.com" \
  -addext "subjectAltName=DNS:bing.com,DNS:www.bing.com"

# 移动到配置目录
mkdir -p /etc/mihomo
mv server.key /etc/mihomo
mv server.crt /etc/mihomo
其中 server.crt 是自签证书,server.key 是 EC 私钥。
生成 Mihomo 配置文件
(注意替换配置文件中的用户名密码)
cat > config.yaml << 'EOF'
listeners:
- name: anytls-in-1
  type: anytls
  port: 8443
  listen: 0.0.0.0
  users:
    username1: 密码1
    username2: 密码2
  certificate: /etc/mihomo/server.crt
  private-key: /etc/mihomo/server.key
  padding-scheme: |
   stop=8
   0=30-30
   1=100-400
   2=400-500,c,500-1000,c,500-1000,c,500-1000,c,500-1000
   3=9-9,500-1000
   4=500-1000
   5=500-1000
   6=500-1000
   7=500-1000
EOF
将配置文件移动到配置目录
mkdir -p /etc/mihomo

mv config.yaml /etc/mihomo/
运行测试
-d 参数是 mihomo 的工作目录,会在其中查找配置文件、规则文件等
mihomo -d /etc/mihomo

# 后台运行
nohup /usr/local/bin/mihomo -d /etc/mihomo > /var/log/mihomo.log 2>&1 &

# 结束进程
pkill -f mihomo
启动后使用 tail -f /var/log/mihomo.log
time="2025-08-15T11:06:20.771313086Z" level=info msg="Start initial configuration in progress"
time="2025-08-15T11:06:20.771797889Z" level=info msg="Geodata Loader mode: memconservative"
time="2025-08-15T11:06:20.771829776Z" level=info msg="Geosite Matcher implementation: succinct"
time="2025-08-15T11:06:20.772283187Z" level=info msg="Initial configuration complete, total time: 0ms"
time="2025-08-15T11:06:20.812756242Z" level=info msg="Sniffer is closed"
time="2025-08-15T11:06:20.814453853Z" level=info msg="AnyTLS[anytls-in-1] proxy listening at: [::]:8443"
time="2025-08-15T11:06:20.814654607Z" level=info msg="Start initial compatible provider default"
Mihomo 服务端启动完毕,在本地 anytls-client 客户端启动的情况下,可以在本地请求获取自己的 IP,预期为服务器的 IP
curl -x socks5://127.0.0.1:1080 https://ip.me本地 Clash Verge 加载配置
目前不太会配置本地 Clash Verge 客户端的 config 配置,用 AI 精简了一个订阅的配置,勉强能用
mode: rule
mixed-port: 7897
allow-lan: false
log-level: warning
ipv6: true
unified-delay: true
external-controller-unix: /var/tmp/verge/verge-mihomo.sock

bind-address: '*'

profile:
  store-selected: true

proxies:
  - name: "Mihomo-anytls"
    type: anytls
    server: 23.xx.xx.xx   # 替换为你的 Mihomo 服务器 IP/域名
    port: 8443            # 替换为你的 Mihomo 配置端口
    username: dong        # 替换为 Mihomo 用户名
    password: qq123456    # 替换为 Mihomo 密码
    tls: true
    skip-cert-verify: true # 自签证书保留 true,可信证书可去掉

proxy-groups:
  - name: "Mihomo-Group"
    type: select
    proxies:
      - "Mihomo-anytls"

rules:
  - MATCH,Mihomo-Group
Firefox 浏览器使用的 SmartProxy 扩展,Clash Verge 使用系统代理模式。
访问 https://www.ipaddress.my/ ,已显示为服务器 IP,可以有效的保护个人隐私。
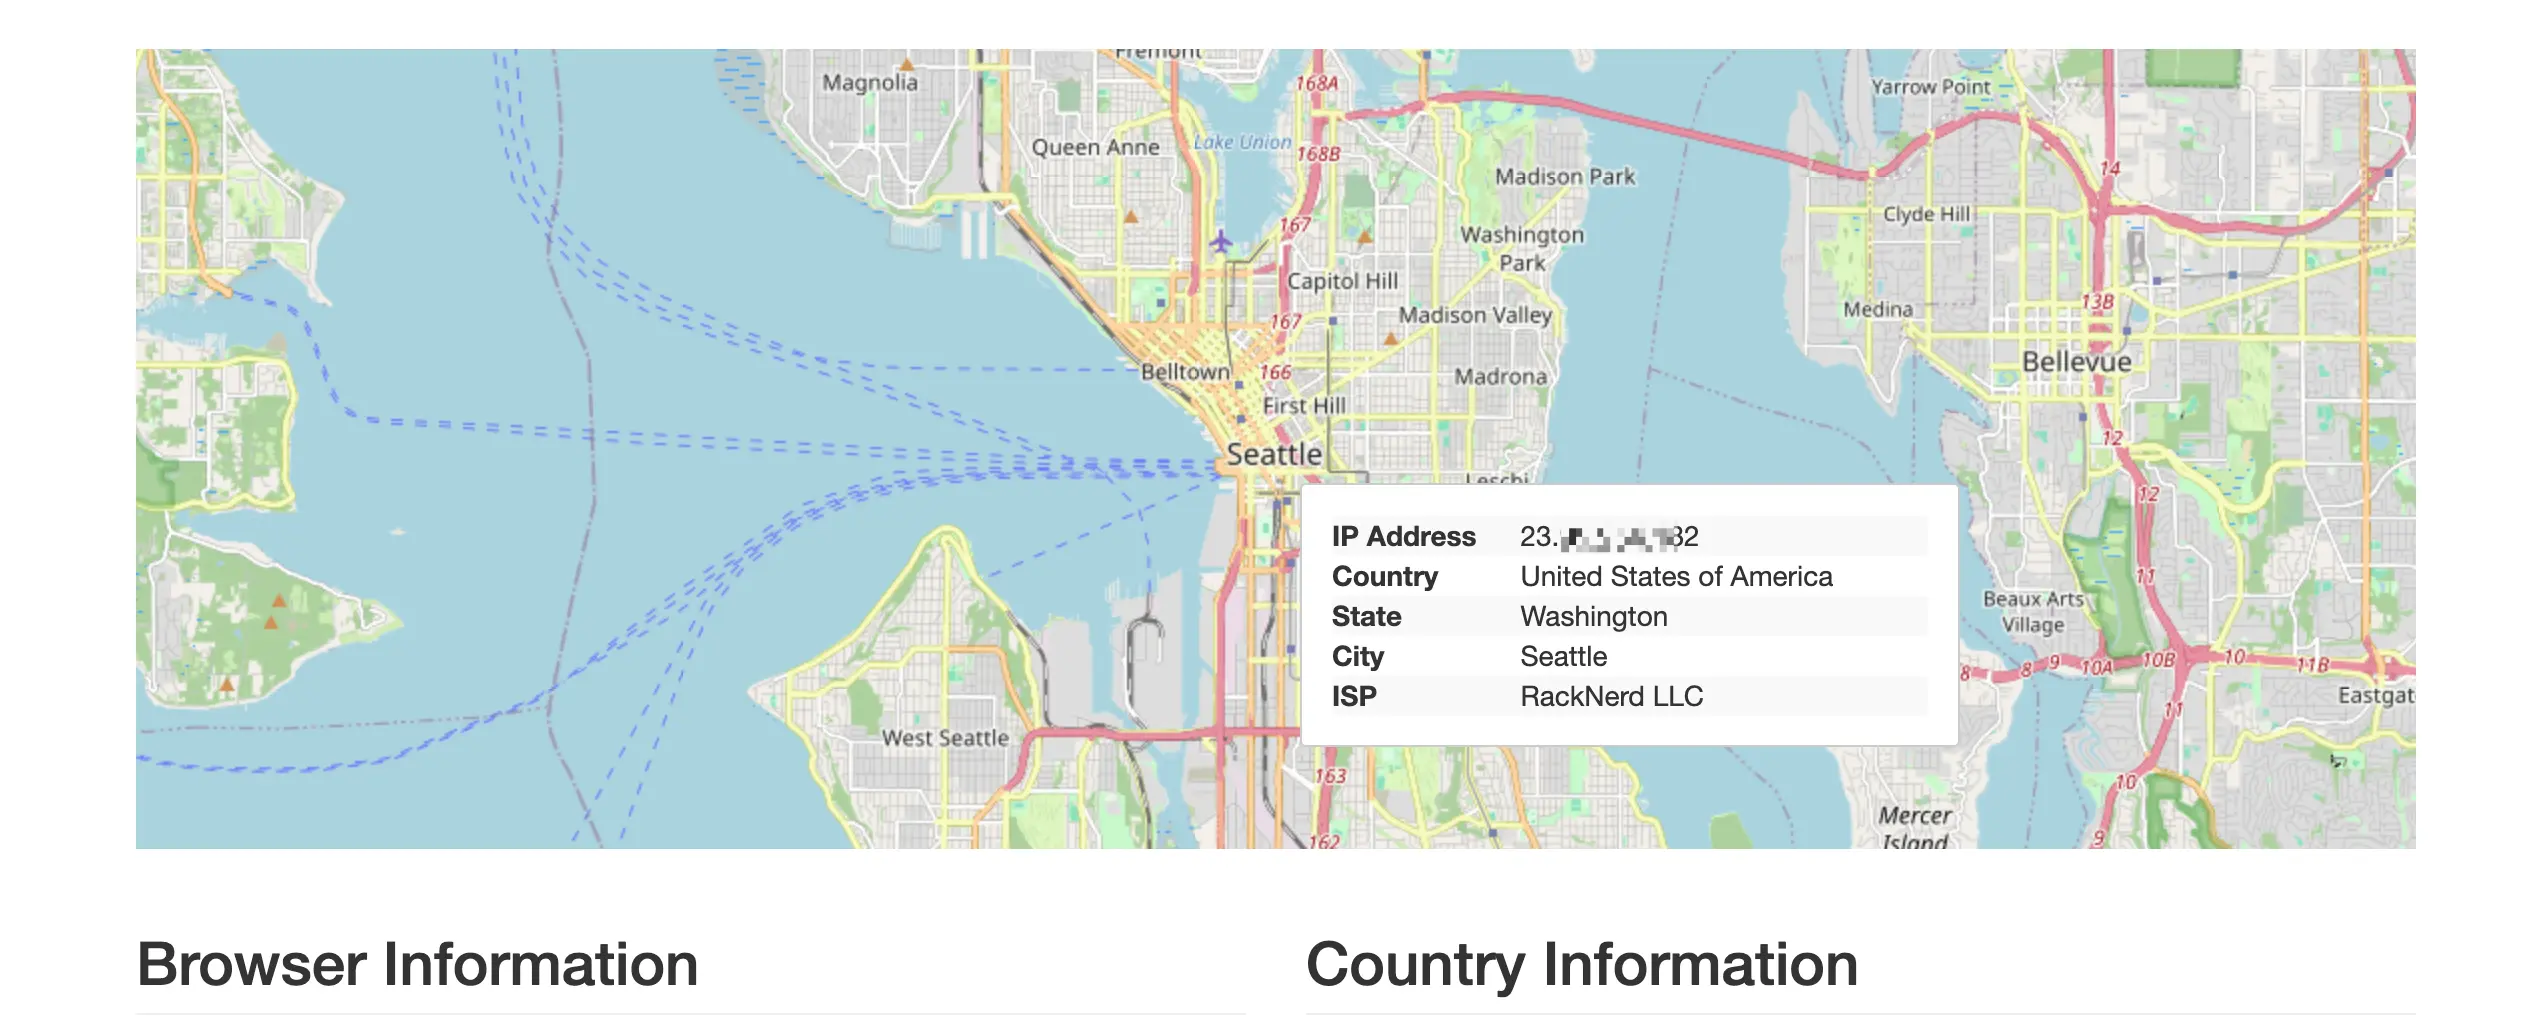
PS:之前有忘记了这个 VPS 是在哪里买的,感谢其显示了 VPS 的 ISP 信息。
生态支持情况
目前 AnyTLS 已获得 sing-box、Mihomo 等主流代理软件的服务端与客户端支持,Shadowrocket(iOS)也在 v2.2.65+ 中增加了客户端支持。详细配置请参考各软件官方文档。